How to Break in New Skates Without Getting Blisters (my Method)
Let’s not sugarcoat it. Brand new skates are basically medieval torture devices disguised as athletic gear. I still remember dropping serious cash on my last pair of boots, stepping onto the ice with a smile, and walking off ten minutes later with my heels bleeding into my socks. It’s a rite of passage that honestly needs to die. Most people just grit their teeth, slap a cheap band-aid on their Achilles tendon, and hope for the best. That is a rookie mistake. Through years of trial, error, and way too much skin lost to stiff thermoplastic, I’ve finally dialed in a foolproof system. Here is the exact blueprint I use to break in a brand new pair of skates without shedding a single drop of blood.

- • Why New Skates Destroy Your Feet (And Why Factory Heat Molding Isn't Enough)
- • Step 1: The Pre-Game Spoon and Pencil Trick
- • Step 2: The Sock Matrix (Thickness Matters)
- • Step 3: Strategic Lacing Zones
- • Step 4: The 20-Minute Rule on Ice
- ↳ Should I use moleskin or blister patches preemptively?
- ↳ Can I use water or alcohol to speed up the break-in process?
- ↳ What if my skates are simply too small?
- ↳ How long does the total break-in process take?
Key Takeaways & Quick Overview
AI Verified
- ✔How to break in new skates without getting blisters (my method) let’s not sugarcoat it.
- ✔Brand new skates are basically medieval torture devices disguised as athletic gear.
- ✔I still remember dropping serious cash on my last pair of boots, stepping onto the ice with a smile, and walking off ten minutes later with my heels bleeding into my socks.
- ✔It’s a rite of passage that honestly needs to die.
Why New Skates Destroy Your Feet (And Why Factory Heat Molding Isn’t Enough)
Here’s the ugly truth about modern skates: they are stiff. Whether you’re dropping coin on high-end hockey boots or custom figure skates, manufacturers build these things out of rigid composites and dense foam designed to lock your ankle in place. When you pull them out of the box, they don’t give a damn about the unique anatomy of your foot. They just want to hold their shape.
Sure, your local pro shop will offer to throw them in a skate oven for five minutes. Does it help? A little. But relying solely on shop baking is like stretching a baseball glove with your bare hands and expecting it to fit like a tailored suit. You need to take matters into your own hands. According to research often discussed in publications like Podiatry Today, friction and localized pressure are the primary culprits behind mechanical skin damage. If you don’t manage the pressure zones *before* you hit the ice, your skin will pay the price.
Step 1: The Pre-Game Spoon and Pencil Trick
Forget wearing them around the house while watching TV. That’s a myth that mostly just ruins your carpet and wastes your time. Instead, we are going to manually manipulate the trouble spots. Every skater has a nemesis area: usually the bony prominence of the ankle or the navicular bone on the midfoot.
Take the rounded back of a metal spoon and press hard against the inside of the boot where you know it’s going to pinch. Rub it in tight, circular motions. This compresses the internal padding preemptively and smooths out harsh glue seams. If a specific eyelet or edge feels like a knife blade, grab the wooden handle of a tool, wedge it into the problem spot, and let it sit overnight. You are essentially pre-crushing the rigidity of the boot before it has a chance to crush your foot.
Step 2: The Sock Matrix (Thickness Matters)
I’m about to break a cardinal rule that your local retail clerk probably told you: do not wear ultra-thin socks on day one. I know, I know—”you lose responsiveness and energy transfer!” Save the paper-thin performance socks for week four. For the initial break-in phase, you need a buffer.
I use a two-layer sock method for the first three sessions. Put on a thin, moisture-wicking athletic sock as your base layer. Over that, pull on a medium-weight, seamless wool or synthetic sock. This extra bulk creates microscopic shear friction *between the socks* instead of *between your skin and the boot lining*. Once the boot starts conforming to your foot shape after session three, drop the outer layer. Trust me on this. It feels counterintuitive, but your heels will thank you.
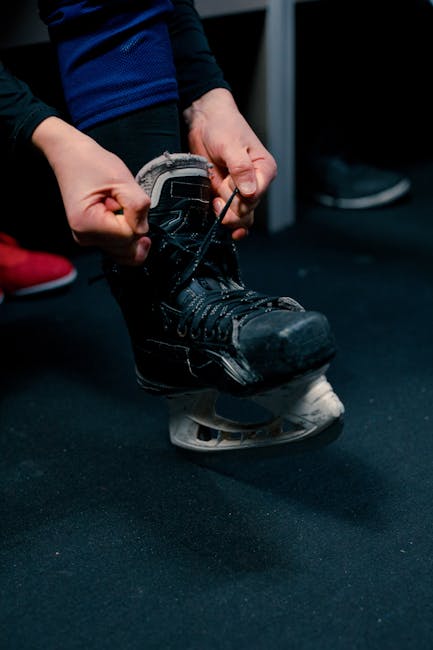
Step 3: Strategic Lacing Zones
Most skaters pull every single lace as tight as humanly possible from toe to top. That is a fast track to nerve damage and killer lace-bite. Your foot needs blood flow to stay warm anyway.
When breaking in new skates, use variable tension lacing. Keep the toe box comfortably snug so your toes aren’t swimming, but don’t choke them. Relax the tension slightly across the arch of your foot. Then, crank it down hard at the ankle wrap to lock your heel into the heel pocket. A loose heel pocket causes friction, and friction equals blisters. By keeping the heel locked while giving the midfoot room to breathe, you stop the foot from sliding back and forth.
Step 4: The 20-Minute Rule on Ice
Do not—I repeat, do *not*—lace up a brand new pair of skates for a full two-hour drop-in session or a grueling figure skating practice. You will not survive.
Your first three outings should strictly adhere to the 20-Minute Rule. Step on the ice, skate easy laps, do some edges, and skate off the moment you feel a hot spot starting to form. Do not wait for the stinging sensation to turn into a full-blown blister. Take the skates off, let your feet cool down, and check the interior for rough spots. This gives your skin time to build micro-calluses without getting shredded down to the raw layer.
Frequently Asked Questions
Should I use moleskin or blister patches preemptively?
Yes. If you already know your history with skates, apply a hydrocolloid bandage or high-end athletic tape to your heels *before* you put your socks on. Do not wait until you feel pain. Prevention is infinitely better than treatment.
Can I use water or alcohol to speed up the break-in process?
Keep liquids away from your boots unless you are heat molding them properly at a shop. Pouring rubbing alcohol or water into skates to stretch them can break down internal adhesives, warp the thermoplastics, and rot eyelets prematurely. Stick to mechanical pressure and proper wear time.
What if my skates are simply too small?
No amount of breaking in will fix a boot that is fundamentally the wrong size or width. If your toes are painfully jammed against the toe cap even after baking and punching out, stop torturing yourself. You bought the wrong size, and you need to trade them in for a wider fit profile (like a EE width or alternative volume model).
How long does the total break-in process take?
If you follow this method, you should have fully comfortable skates within 5 to 7 on-ice sessions. If you rush it, expect a month of misery.